Cookies help us deliver the best experience on our website. By clicking Accept you are agreeing to the placement and use of cookies as described in our privacy policy.


Mini Pumpkin
DAYS TO SPROUT
DAYS TO
SPROUT
7-14
MATURES IN
MATURES
IN
100-130
TASTE IT FOR
TASTE IT
FOR
N/A
Plant Portfolio
Care & Harvest
🐝 Pollination: Mini Pumpkins require pollination. Pumpkins are monecious meaning they grow both male and female flowers. Male flowers have thin, straight stems and open first, while female flowers have round, swollen stems (like a baby fruit) and open later. Both must be present to make fruit. When flowers appear, hand-pollinate them by alternating between male and female flowers, gently disturbing the inside of blossoms with your finger or a small brush. If the plant is stressed, it will drop its female flowers almost immediately.
⭕ Support: Mini Pumpkins require support as they mature. Once the plant reaches 6 inches, ensure it’s in its final spot on your Gardyn so you can direct the vine’s growth up the center column. We recommend using our Plant Belts to help.
✂️ Pruning: Mini Pumpkins require pruning. Snip away yellow or brown leaves if they appear, and trim back the main stem if it grows beyond 2 feet. This allows for lateral branches to grow, making the plant bushier while ensuring the vine stays within your Gardyn’s light. Mini Pumpkins have a robust root system, so we recommend checking the roots twice a month and trimming any that are brown or extending past the yPod. Once flowers start to fade, remove any that don’t have a fruit forming by pinching the stem below the base of the flower head. This helps the plant refocus its energy on producing the next wave of blooms. Foliage may show signs of stress as fruit begin ripening, which is normal.
🔎 Plant Health: Mini Pumpkins require very high nutrient levels to sustain healthy growth. To meet this need, we recommend twice monthly tank refreshes, twice monthly root checks/pruning, and weekly doses of HydroBoost. In addition, we recommend only growing 2 Mini Pumpkin yCubes on your Gardyn at a time. Aphids and spider mites are common pests, but you can use our prevention tricks to keep them at bay!
🎃 Harvest: These adorable Mini Pumpkins are ready to harvest when they are about 2-3 inches in diameter, 1-2 inches tall, and have fully developed their bright orange color. When harvesting, use clean scissors to cut the pumpkin from the vine, leaving 1-2 inches of stem intact on the pumpkin. Each plant can produce 2-3 mini pumpkins depending on care.
Quick Facts
Pumpkins were first grown in Central America hundreds of years ago. Today, these squashes can be found in many colors of the rainbow and a wide variety of sizes, ranging from handheld miniatures to 1-ton giants.
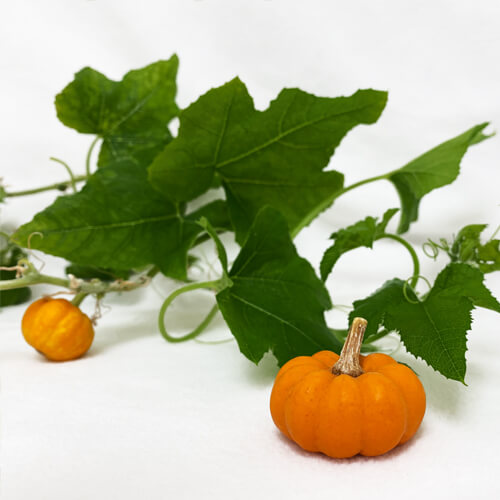
Mini Pumpkins are a vining plant with bright orange fruit that only grow to about 2-3 inches big. While this adorable fall favorite is popular for many ornamental uses, its flesh is also edible with a mild, slightly sweet taste. Mini Pumpkins develop separate “male” and “female” flowers that are both needed for proper pollination and fruit formation (see the “Pollination” section in “Care & Harvest” for details).
Mini Pumpkins have a multitude of decorative and culinary uses. Enjoy the fruit as a tabletop (or Gardyn lid) accent, as a medium for arts and crafts projects, or baked or roasted into a festive appetizer. You can even carve your Mini Pumpkin as a tiny jack-o-lantern, or turn it into a fun serving bowl for your favorite soup, curry, or custard.
Harvest to Plate Recipe
How To Cook Mini Pumpkin
INGREDIENTS
- 4 Mini Pumpkins – you can also just use ramekins.
- 2 cups Heavy Cream
- ⅓ cup Sugar (plus extra for topping)
- 4 Egg Yolks
- 1 teaspoon Vanilla Extract
- 1 cup Pumpkin Puree
- ½ teaspoon Ground Cinnamon
- ½ teaspoon Ground Ginger
- ¼ teaspoon Salt
INSTRUCTIONS
Prepare the Pumpkins
-
If you want to make this recipe in ramekins instead of mini pumpkins, skip ahead to the next section.
-
Find the point of the pumpkin where the shape starts to curve in towards the top. Using a large, sharp knife, make a flat and level cut all the way through to cut the top of the pumpkin off.4 Mini Pumpkins
-
Use a spoon to scoop out the seeds and pulp from inside the pumpkins and hollow them out. Do the same with the ‘lids’.
-
Place the pumpkin ‘bowls’ in a deep roasting dish, ready for the custard. Leave the lids aside for now.
Make the Creme Brulee
-
Preheat the oven to 300°F / 150°C.
-
Put the egg yolks and sugar in a bowl and gently whisk until combined.4 Egg Yolks,⅓ cup Sugar
-
In a saucepan, heat the heavy cream and vanilla over medium-low heat.2 cups Heavy Cream,1 teaspoon Vanilla Extract
-
Once the cream starts to feel warm to the touch, pour a small amount of it into the egg yolk/sugar mixture and whisk together.
-
Continue to drizzle the warm cream into the egg yolks slowly, whisking as you go, until it has all been added. It’s important to do this gradually so you don’t scramble the eggs.
-
Once all the cream has been added, pour the whole mixture back into the saucepan.
-
Add the pumpkin puree, cinnamon, ginger and salt to the custard mixture and continue to heat on medium-low, stirring the whole time with the whisk to prevent burning.1 cup Pumpkin Puree,½ teaspoon Ground Cinnamon,½ teaspoon Ground Ginger,¼ teaspoon Salt
-
Once you see the custard start to simmer, remove from the heat and transfer the custard into a jug. (If you have any lumps in the custard, you can just pass it through a sieve first.
-
Pour the pumpkin custard into the mini pumpkin bowls, filling them all the way to the top.
-
Put the creme brulees into the oven on the middle rack. Before closing the door, make a water bath by pouring water into the roasting dish until it reaches about halfway up the pumpkins. Be careful not to splash any onto the custard.
-
Bake for 20 – 30 minutes depending on the size of your pumpkins. When they are done the outside should be set but the middle will still be quite wobbly.
-
Remove from the oven and let cool in the water bath. Once they are cool enough to touch, remove them from the water and put them in the fridge until ready to serve. At this point, you can put the little lids back on if you like.
No products in the cart.