How to grow Stevia indoors?

Are you ready to embark on a journey of growing your own stevia at home? Not only will you find pleasure in cultivating this sugar alternative but indoor gardening, in general, is a sustainable and healthy choice for those looking to ditch over-priced produce at the grocery store.

Why choose to grow stevia at home? The benefits are abundant. By creating a garden oasis indoors, you can enjoy the beauty and abundance of fresh stevia plant leaves year-round. In this guide, we’ll walk you through the step-by-step process of growing stevia indoors, ensuring a rewarding experience.

Looking to get your hands on some fresh stevia all year-round? Gardyn’s Home Kit 3.0 makes indoor gardens easy for both city-slickers and suburban dwellers alike.

DAYS TO SPROUT

14-21 DAYS

MATURE IN

40-60 DAYS

TASTE IT FOR

24+ WEEKS

Table of Contents

Care & Harvest

✂️ Pruning

In case you notice brown spots on the leaves, it is advisable to remove them. Monthly root inspections should be conducted, and any brown roots or those extending beyond the yPod should be trimmed.

🔎 Plant Health

Our preventive techniques can be employed to effectively control spider mite infestations, a common garden pest.

🥬 Harvest

Regular harvesting contributes to the plant’s longevity. You can either pluck individual leaves or use clean shears to trim stems above growth nodes. Once the plant reaches a height of 8 inches, larger outer leaves can be pruned. To encourage further growth, leave approximately one-third of the plant intact.

The Benefits of Growing Stevia at Home

Fresh stevia leaves and small bowl with sugar on a white wooden table.

Growing stevia indoors offers a range of benefits that make it an ideal choice for urban dwellers and environmentally-conscious individuals seeking fresh and locally sourced food. Let’s explore why cultivating stevia in the comfort of your own home is a game-changer for your culinary adventures and sustainable living.

Year-round Stevia Just for You

Unlike outdoor gardening, where stevia’s growth is limited to specific seasons, indoor cultivation provides a controlled environment where you can enjoy this herb whenever you desire. Imagine adding a touch of natural sweetness to your dishes and beverages straight from your indoor garden, regardless of the time of year.

Fresh Produce Straight From Your Home

With store bought herbs, vegetables, and fruits, you just don’t what’s on them or in them. However, indoor gardening eliminates the reliance on pesticides and other harmful chemicals. With Gardyn’s hydroponic technology, you can grow stevia using only natural, non-toxic nutrients, ensuring that your harvest is free from harmful contaminants. This all-natural approach not only contributes to your well-being but also supports the health of the planet.

Don’t Have a Lot of Space? No Problem!

Moreover, growing stevia indoors maximizes the use of limited space. Whether you live in a compact apartment or have a small kitchen, Gardyn’s innovative solutions make it possible to grow up to 30 stevia plants in just 2 square feet. You no longer need a sprawling garden to experience the joys of homegrown stevia. Embrace the efficiency of indoor gardening and transform your living space into a lush oasis of flavor and nutrition.

Grow Microgreens, Too

Bite sized superfood packed with nutrients and loaded with flavor. Go from seed to harvest in just one week.

The Essential Requirements for Growing Stevia Indoors

Though you may be happy to get started immediately, there are just a few essential elements you need to consider before you start to grow stevia indoors. From choosing the right soil to providing adequate lighting and selecting the appropriate containers, let’s learn and explore the key requirements for successfully cultivating stevia in the comfort of your own home:

  • 1.Soil: Opt for a well-draining soil mix that is rich in organic matter. Stevia thrives in loamy soil that retains moisture while allowing excess water to drain away. Consider a high-quality potting mix formulated for indoor gardening to provide the ideal growing medium for your stevia plants.
  • 2.Lighting: Stevia plants grow best when there is abundant sunlight or artificial light to grow and flourish. Place your plants in a location that receives at least 6-8 hours of direct sunlight each day. If natural light is limited, supplement with full-spectrum grow lights to ensure your stevia plants receive the necessary light energy for photosynthesis. You’ll start having stevia flowers in a matter of a couple of weeks.
  • 3.Containers: Choose containers that are deep enough to accommodate the root system of your stevia plants. Opt for pots with drainage holes to prevent waterlogging. If you’re curious to know of another alternative that will relieve you of these meticulous instruction, Gardyn’s Home Kits offers a convenient all-in-one solution, providing specially designed yCubes that fit seamlessly into their vertical hydroponic system.
  • 4.Watering: Stevia plants prefer consistent moisture levels. Water them regularly, ensuring the soil is moist but not overly saturated. Avoid letting the soil dry out completely between watering sessions. Gardyn’s smart and Hybriponic™ technology takes care of watering for you, ensuring your stevia plants receive the right amount of hydration at the right time.

By following these steps, you can create an optimal environment for your indoor stevia garden. However, Gardyn takes it a step further with their innovative hydroponic system that simplifies the entire process. 

Curious to Know a Bit More?

Step-by-Step Guide to Planting Stevia Indoors

Now that you have all the necessary components ready, it’s time to dive into the exciting process of planting stevia indoors. Whether you’re using traditional pots or opting for Gardyn’s Home Kit with its innovative hydroponic system, the steps to plant stevia remain relatively similar.

Step 1: Prepare the Containers

If you’re using traditional pots, fill them with the well-draining soil mix we mentioned earlier. Ensure the containers have proper drainage holes to prevent water accumulation. For Gardyn’s Home Kit, simply insert the yCubes into the designated slots in the vertical hydroponic system.

Step 2: Planting Stevia Seeds or Seedlings

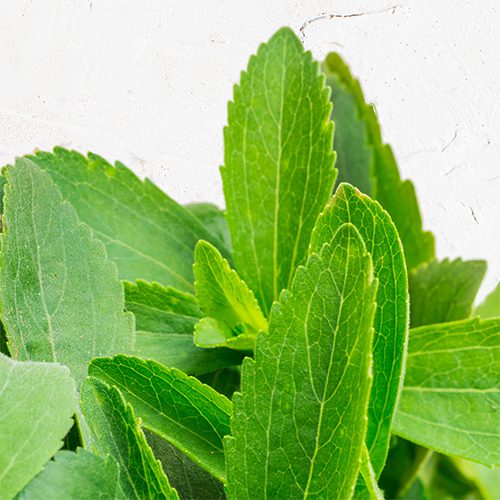
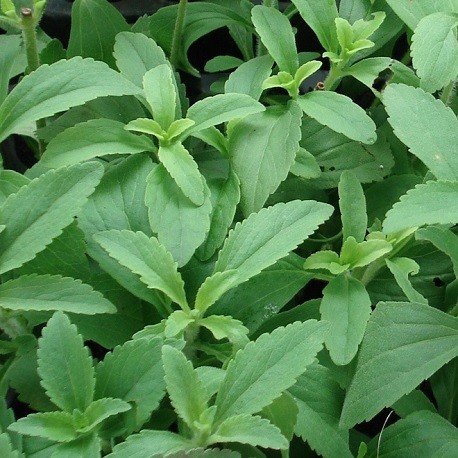
If you prefer to start from seeds, sow them at a shallow depth, approximately 1/4 inch, and lightly cover them with soil. Keep the soil consistently moist until the seeds germinate, which typically takes around 1-2 weeks. If you choose to use stevia seedlings, gently transplant them into the containers, making sure to maintain their original soil level.

Step 3: Watering

After planting, water the soil thoroughly, ensuring it is evenly moist. Stevia plants require consistent moisture, so monitor the soil moisture levels and water as needed. Avoid overwatering, as it can lead to root rot. Gardyn’s automated watering system takes the guesswork out of watering, providing your stevia plants with the perfect amount of hydration.

Step 4: Using Gardyn's yCubes

Finally, gently remove the rosemary seedling from its original container, being mindful not to damage the roots. Place them in the holes and fill them with soil. Don’t forget to lightly press the soil around the plants to ensure good stability. If using Gardyn’s yCubes, simply insert the pod into the designated slot on the Gardyn Home Kit, following the instructions provided.

Step 5: Positioning and Light

Place your containers or Gardyn’s Home Kit in a well-lit area where your stevia plants can receive ample sunlight or artificial light. Ensure they have access to at least 6-8 hours of light daily. If using artificial lighting, position the lights approximately 6-12 inches above the plants for optimal growth.

By following these steps, you’ll be on your way to successfully planting stevia indoors. Gardyn’s innovative technology and user-friendly approach make the process even more seamless and rewarding. In the next section, we will delve into the essential care requirements for your growing stevia plants. Get ready to nurture and witness their transformation as they thrive in your indoor garden oasis.

Caring for Your Indoor Stevia Plants

Caring for your stevia plants is crucial to ensure their health and maximize their growth potential. By providing the right conditions and utilizing Gardyn’s advanced technology, you can easily maintain thriving stevia plants in your indoor garden.

Watering

Stevia plants prefer consistently moist soil, but be cautious not to overwater them. Check the moisture level regularly and water when the top inch of soil feels dry to the touch. Gardyn’s automated watering system takes care of this for you, ensuring your stevia plants receive the perfect amount of hydration without the risk of overwatering.

Fertilizing

Stevia plants benefit from regular fertilization to support their growth and enhance their flavor. Use a balanced organic fertilizer or a specially formulated hydroponic nutrient solution according to the package instructions. Gardyn’s hydroponic system provides the necessary nutrients to your plants automatically, eliminating the guesswork of fertilization.

Pruning

Regular pruning helps maintain the compact shape of your stevia plants and encourages bushier growth. Pinch off the top leaves and stem tips when the plant reaches around 6-8 inches in height. This stimulates lateral branching and leads to a fuller plant. Gardyn’s smart AI assistant, Kelby, can guide you through the pruning process and provide personalized recommendations based on the growth of your plants.

Environemental Factors

Stevia plants thrive in temperatures between 60°F and 75°F (15°C to 24°C). Ensure they are placed in a location with adequate air circulation and avoid exposing them to drafts or extreme temperature fluctuations. Gardyn’s monitoring system keeps track of environmental conditions, allowing you to adjust settings and ensure optimal growing conditions for your stevia plants.

With Gardyn’s automated care features and your attention to the specific needs of stevia plants, you can easily provide the ideal growing environment. As your plants continue to flourish, it’s time to explore the rewarding process of harvesting and utilizing the sweet leaves of your stevia plants, which we’ll delve into in the next section. Get ready to enjoy the fruits of your labor and add a touch of sweetness to your culinary creations.

Harvesting and Utilizing Homegrown Stevia

Now it’s time to reap the rewards of your indoor gardening journey by harvesting and using the flavorful stevia leaves in various creative ways.

Harvesting

When your stevia plants have reached a height of 10-12 inches and developed mature leaves, it’s time to harvest. Select individual leaves or cut entire stems, leaving a few sets of leaves on the plant to encourage further growth. Use sharp, clean scissors or pruning shears to make clean cuts just above a leaf node. Gardyn’s time-lapse feature allows you to capture the growth progress of your plants, ensuring you harvest at the optimal time.

Drying

To preserve the sweetness of your stevia leaves, drying is essential. Gather the harvested stems and tie them together with a string or rubber band. Hang the bundle upside down in a cool, well-ventilated area away from direct sunlight. Once the leaves are completely dry and brittle, remove them from the stems and store them in an airtight container. Dried stevia leaves can be stored for several months and used whenever you desire a natural sweetener.

Using Stevia

Stevia leaves, known for their intense sweetness and can be used as a natural sugar substitute in various culinary endeavors. Crush the dried leaves into a fine powder using a mortar and pestle or a blender. This homemade stevia powder can be used in teas, beverages, desserts, and even savory dishes. Experiment with different recipes and enjoy the guilt-free sweetness that stevia brings to your favorite treats. If you’re looking for additional tips, one of the perks of joining the Gardyn family is access to our app with loads of tips and recipes for your green indoor oasis.

Remember, a little goes a long way with stevia, as its sweetness is significantly more potent than regular sugar. Start with small quantities and adjust to taste. Gardyn’s commitment to providing fresh and locally sourced food extends to your kitchen, where you can now savor the fruits of your indoor gardening efforts while enjoying the numerous benefits of stevia and other Gardyn selections.

In conclusion, growing stevia indoors with Gardyn’s advanced technology and guidance has allowed you to embark on a rewarding journey of cultivating your own sweetener. From planting and caring for your stevia plants to harvesting and utilizing the leaves, Gardyn has made the process easy and enjoyable for everyone looking to change the way they view food.


Take pride in your green thumb and the ability to create delicious, healthy dishes in a limited indoor space. Join the Gardyn community and continue to explore the wonders of indoor gardening today.

Everything You Can Grow

Choose from 100+ tasty varieties

Grow All Your Produce
for as low as $29/Month

$0 down, 0% APR up to 24 months

Want to Discover More Varieties to Grow?

Explore our dedicated pages for a complete guide on all the information you require to successfully cultivate your own plants at home​.

HerbsGreensFruitsFlowers